|
|
V-Drive (cont) |
Attachment to the propeller shaft coupler is a little different than with the RV-20. The RV-26 uses eight fasteners rather than six, and they are in a different position. This means that you can't reuse the old coupler. The good news is that the eight bolts are easier to assemble because you can get a wrench on the nuts. The V-drive must be aligned with both the propeller shaft and the engine shaft. Alignment of the propeller shaft is done by adjusting the position of the V-drive in its pan. Alignment of the engine shaft is done by adjusting the position of the engine. Alignment with respect to the propeller shaft is critical. Walter specifies a tolerance of .003 inches. I find that closer adjustment is needed for smooth performance at high RPMs. This must be done with feeler gauges. It is very difficult to measure this kind of precision with feeler gauges. The output shaft is free to move while you attempt to measure coupling clearance at four points. I found it easier to manage if a couple of flange mounting bolts were left in place. They can be tightened until the flange is almost touching at one point, then the clearance can be measured at the other three points. I'm not sure that it is worth the effort to make a careful alignment when the boat is on-the-hard. The hull will flex when the boat is launched, likely changing shaft alignment. In fact, I had to fine-tune the alignment a few times after the boat was launched. Alignment of the V-drive to the engine is not as critical as it is with a standard installation. Walter provides an alignment tool that can be used to verify that the engine is mounted at the correct height. They do not specify a tolerance for this alignment, but they provide an alignment tool and directions. They specify that the engine should be aligned with the flexible drive shaft within 3 degrees as measured with a straightedge (1/8"). Replacing the raw-water strainer wasn't on my repower list. While jockeying the V-drive into position, I must have hit the strainer. It broke-off where a brass pipe nipple attached the strainer to the seacock. In retrospect, this was a blessing. If this had failed while underway, the consequences could have been severe. I replace the old strainer with a new Groco raw-water strainer and replaced the remaining hoses. Finding bronze nipples or tail-pieces on short notice proved difficult. I ended up using nylon tail-pieces as temporary substitutes until I could get proper fittings. |
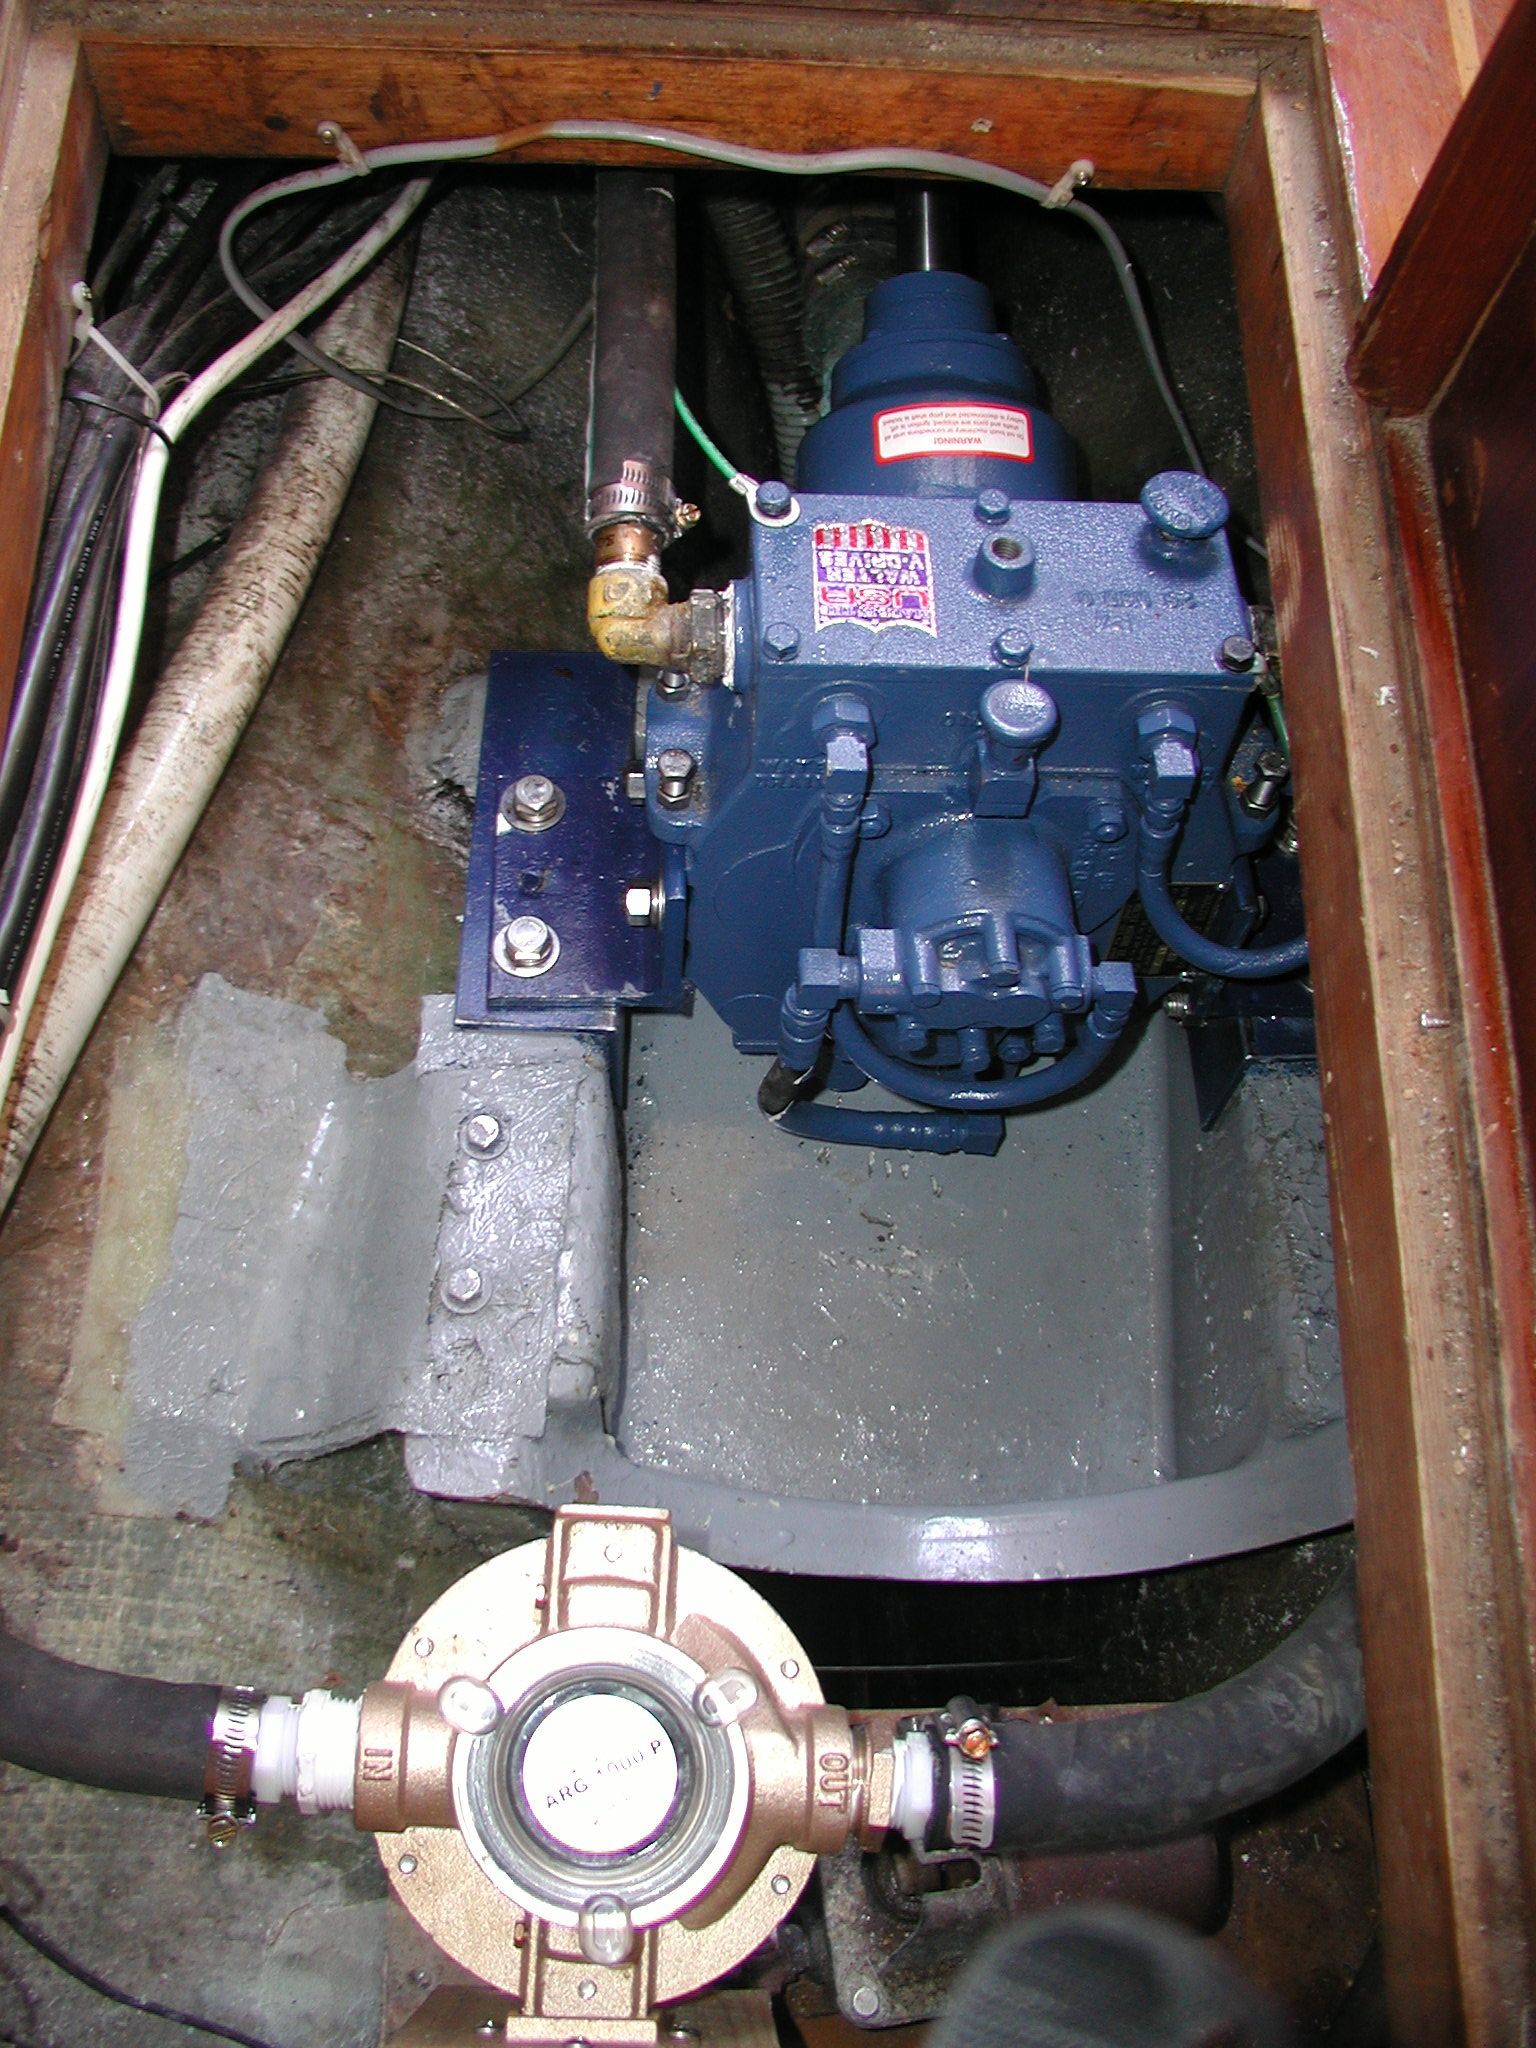
V-Drive shown to the right. The pan attachment to the hull was reenforced on both port and starboard sides. The original mounting flange was replaced with a custom made bracket. If you look closely you can see where the side of the old pan was cutout to allow getting bolts in from the side. You can also just see one of the side bolts on the right under the V-drive. (click to enlarge) |