|
|
Maincabin Companionway Restoration (cont) |
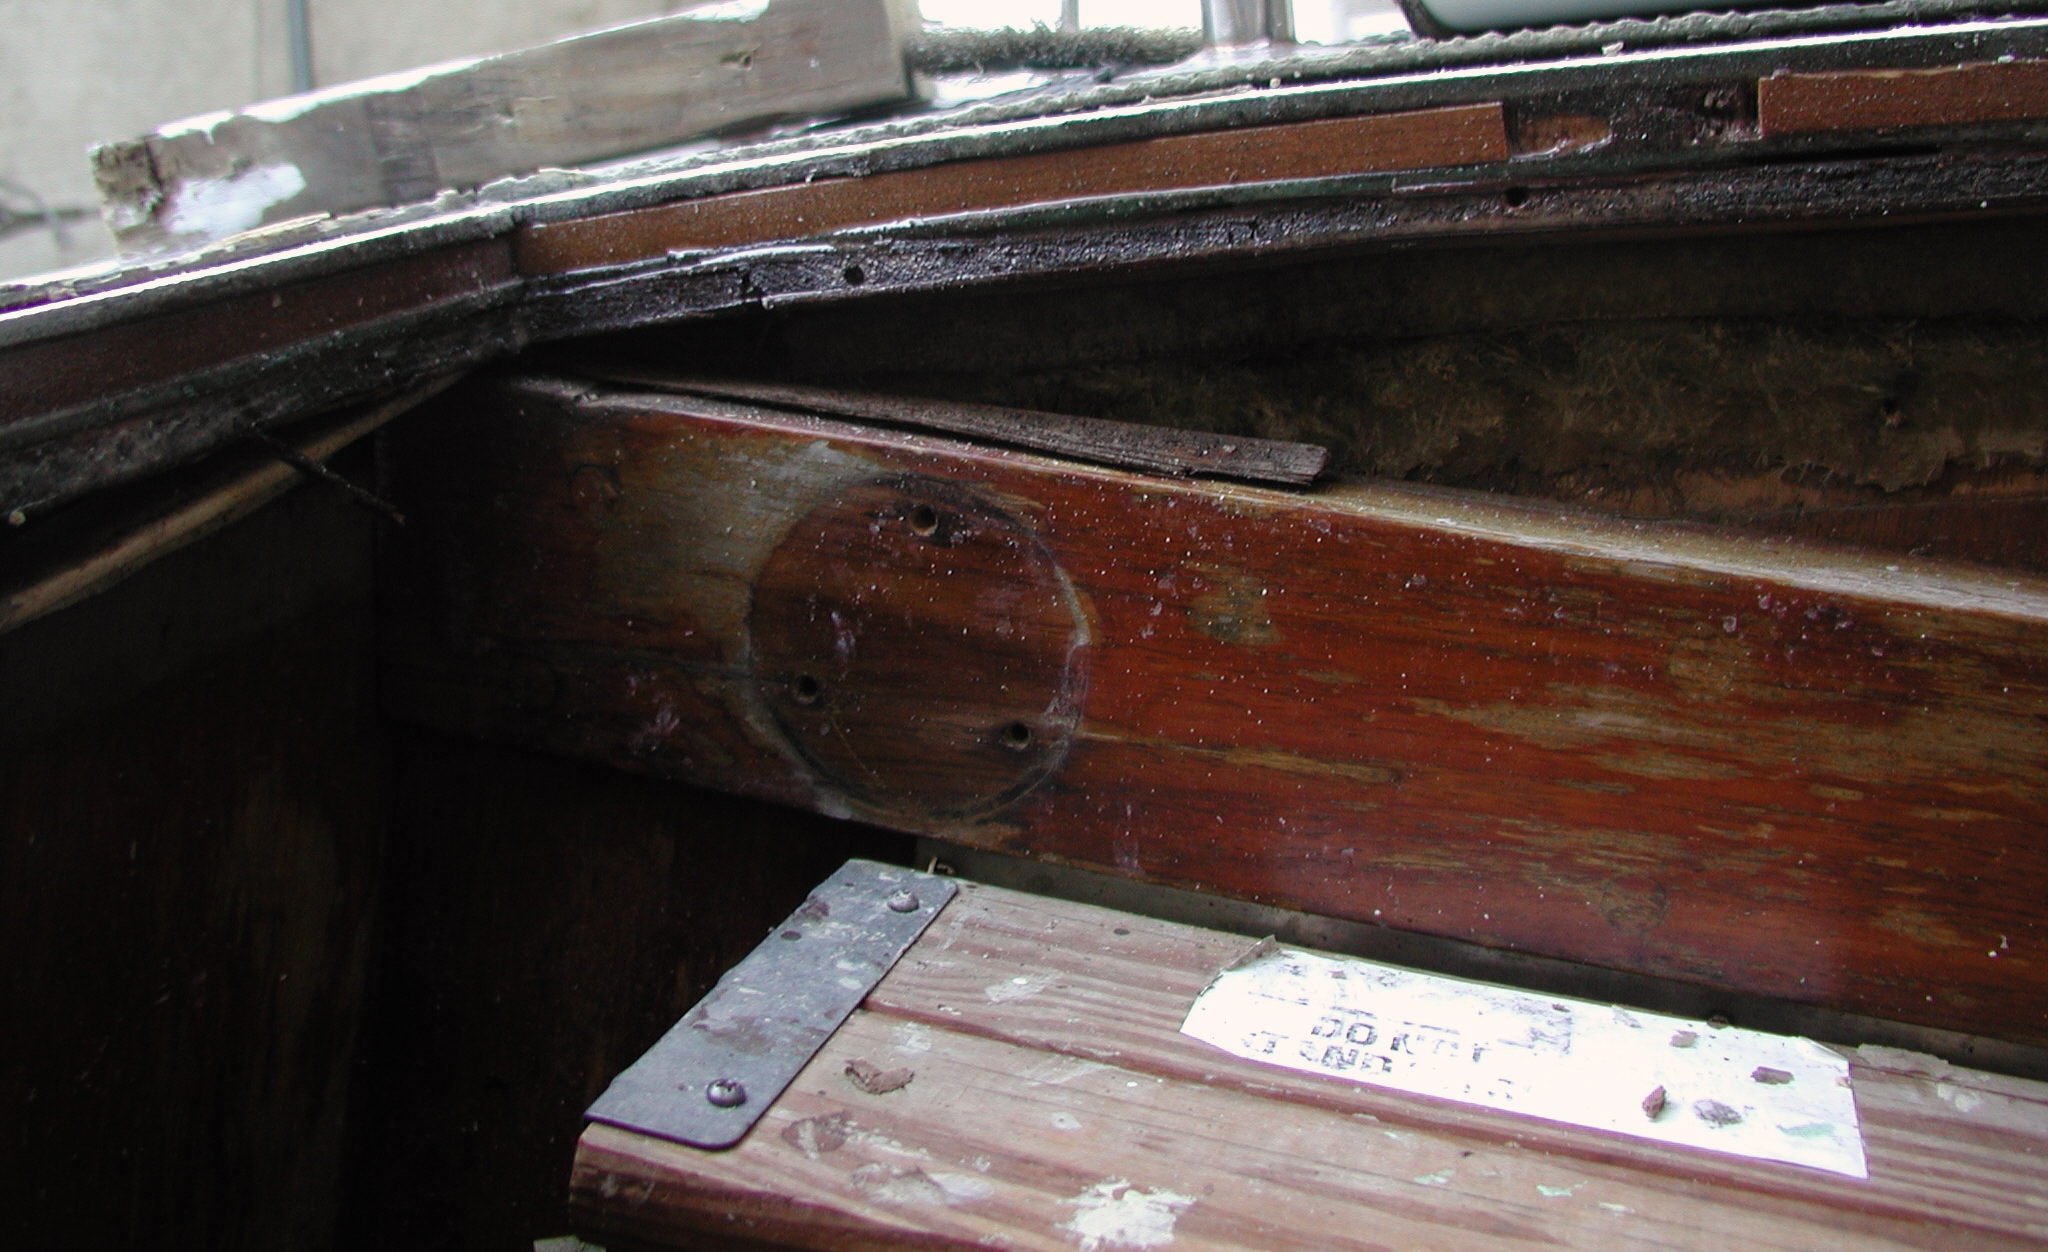
After winterizing and covering the boat, I finally had a chance to remove the hatch. Removing the hatch ended up being more difficult than I anticipated. Pearson used silicon sealant to bed the hatch trim. This glued the screws in place. A screw-gun with appropriate sized bits can remove the fasteners, but it takes patience and some skill to avoid stripping the screw heads. I doubt that any of them could have been disassembled without a good screw-gun and correctly sized bits. Several of the exposed screws around the inside of the deck hatch were brass. These screw heads were too soft for the screw-gun to get a good bite. I ended up drilling out several of these. The aluminum hatch track around the stainless screws had corroded. This made it difficult to remove the screws, two of which had to be drilled out. Screws that hold the hatch frame to the deck were countersunk and bunged; even those under the hatch track. The plugs were set with something to hold them in place, probably varnish. This left the screw heads full of varnish, making them difficult to remove. These screw heads had to be painstakingly cleaned before the screwdriver bit could get a firm grip. Half of them had their heads damaged during removal. After the fasteners were removed, the teak trim was still held in place with silicone adhesive. It was difficult to remove this trim without breaking anything. I cracked a couple of pieces. It took about 6 hours to remove the hatch and associated trim. With the hatch removed, I was able to inspect the deck core. There was rot in three of the four corners, the two aft corners and the inboard forward corner. Rot around the forward corner extended to a depth of about four inches. Rot around the other two corners extended to a depth of six or seven inches. It appears that very little water got under the hatch frame. The leaks were primarily in the corners where the hatch frame pieces joined. I noticed that both inboard corners had an extra screw that came in from the side. Extra fasteners were also added to the frame under the inboard hatch slide. This looks like they may have been added after the boat was built; perhaps a failed attempt to stop the leak. There appeared to be no caulking compound in the corners of the hatch trim. How Pearson expected these to be watertight is a mystery. There was a generous coating of caulking under the trim pieces. I found that it hadn't adhered to the gelcoat very well. I suspect that the fiberglass hadn't been cleaned properly before the caulking was applied. I was impressed with how limited the rot was that I found. The end-grain balsa apparently resists water migration. In some places, there was a little space between balsa blocks that was filled with epoxy when the deck was laid-up. For the most part, I think the water just didn't wick through the deck. I used a flat-blade screwdriver to dig out the rotted core. A shop-vac helped suck the fragments out. Fasteners that hold the coach-roof in place protrude through the bottom of the deck. These make it difficult to remove the rotted core. I spent two hours digging at the rotted deck, removing anything that was loose enough to dig out. The balsa adjacent to the rot was also moist. I left the deck core exposed in the hope that any remaining moisture would dry. There isn't any way that I can think of to suck the water out. To make sure that rot doesn't continue after the repair, I sprayed a mixture of boric acid and potable anti-freeze into the exposed deck. Boric acid is a natural anti-fungal found in any hardware store. After letting the solution sit for about a week, I swabbed out the exposed deck with denatured alcohol and dried it as best I could with a heat-gun. I then glued wood strips to the face of the damaged deck, leaving the rotted section empty. Click on the photo below for a larger image. |
Deck shown to the left after the rotted core was removed and wood strips glued over the voids. |